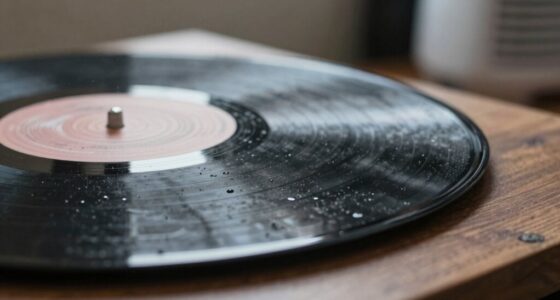

Many people skip vital steps like properly leveling the turntable and accurately aligning the cartridge, which can seriously affect sound quality and record wear. Small misadjustments in tonearm balance, tracking force, or anti-skate often go unnoticed but can cause distortion, skipping, or uneven stylus contact. Ensuring your surface is flat, your cartridge is precisely aligned, and your turntable is level makes a big difference. Stick with us to learn how these setup basics can improve your listening experience.
Key Takeaways
- Proper cartridge alignment using protractors or mirrors prevents tracking errors and reduces distortion.
- Ensuring the turntable surface is perfectly level maintains accurate stylus tracking and playback.
- Correct tracking force setting avoids record wear and stylus damage, improving sound quality.
- Matching anti-skate with tracking force keeps the stylus centered, preventing skipping.
- Regular calibration and surface checks optimize performance and prolong equipment lifespan.
Why Proper Turntable Alignment Is Key to Great Sound

Proper turntable alignment is essential because even slight misadjustments can considerably impact sound quality. When your tonearm weight isn’t correctly balanced, it affects the stylus pressure, which influences how the stylus engages with the record grooves. Too much pressure can cause excessive wear on both the record and stylus, leading to distortions and reduced sound clarity. Conversely, too little pressure results in skipping or poor tracking. Ensuring your tonearm weight is properly calibrated helps maintain the right stylus pressure, delivering accurate sound reproduction. Proper alignment minimizes unwanted resonance and channel imbalance, so you get the richest, clearest audio possible. Taking the time to set your turntable correctly pays off with a more enjoyable listening experience and longer equipment lifespan. Additionally, understanding the importance of proper setup techniques can help prevent common issues and extend the life of your records and stylus.
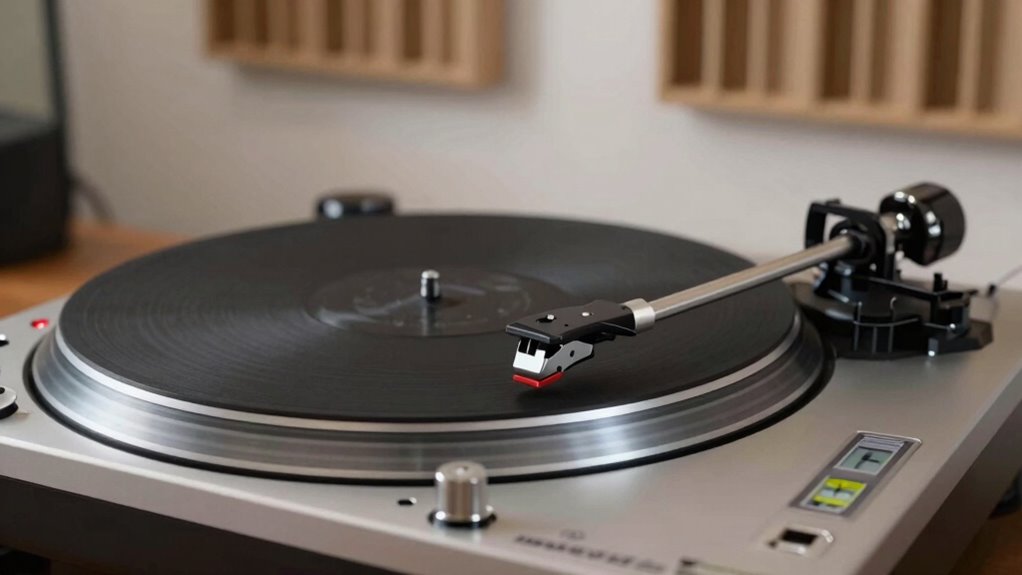
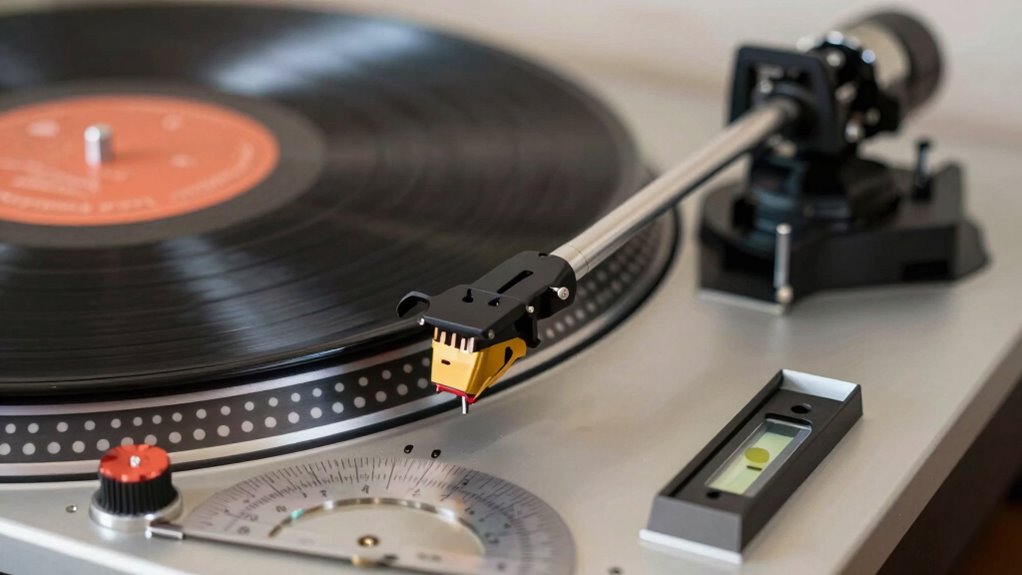
How to Align Your Cartridge for the Best Sound
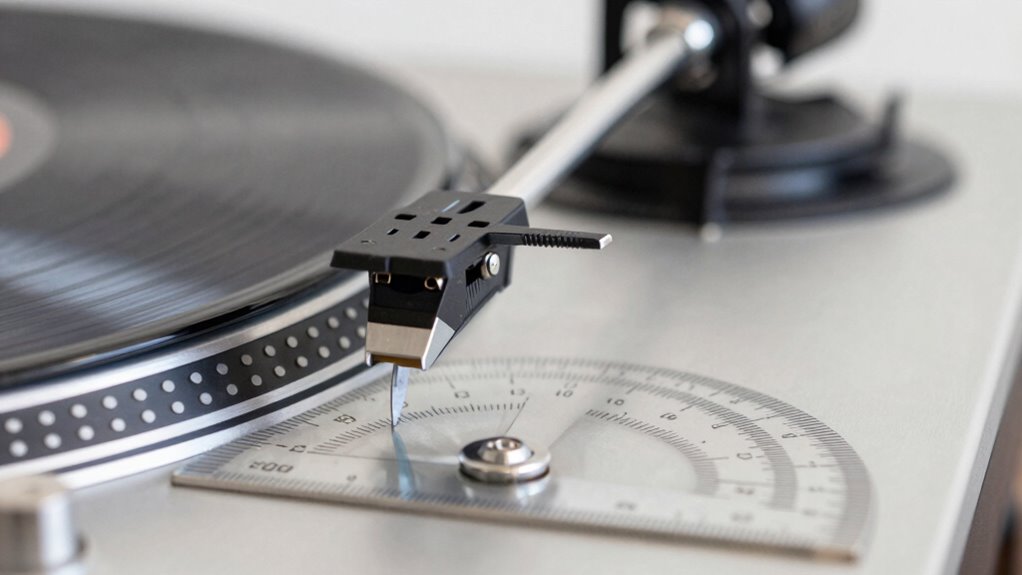
Aligning your cartridge correctly is essential for achieving the best sound quality from your turntable. Proper alignment ensures your stylus tracks accurately, reducing distortion and wear. Pay attention to cartridge geometry, including alignment angles and overhang, to match your tonearm’s specifications. The stylus shape also impacts sound and tracking; ensure it’s properly positioned for optimal contact. Use a mirror or alignment protractor to check the cartridge’s position precisely. Adjust the cartridge so it sits evenly within the headshell slots, maintaining the correct overhang. Focus on achieving the proper azimuth, tracking force, and anti-skate settings afterward. Proper alignment minimizes distortion and maximizes sound clarity, allowing your records to sound their best. Additionally, understanding the importance of cartridge calibration can further enhance your listening experience.
Level Your Turntable for Accurate Playback
To get the best sound, your turntable needs to be perfectly level. Use a spirit level to check the surface and guarantee it’s flat. If it’s not, adjust the turntable feet until it’s even, so playback remains accurate. Ensuring proper auditory feedback during setup can help maintain consistent sound quality and prevent issues caused by misalignment.
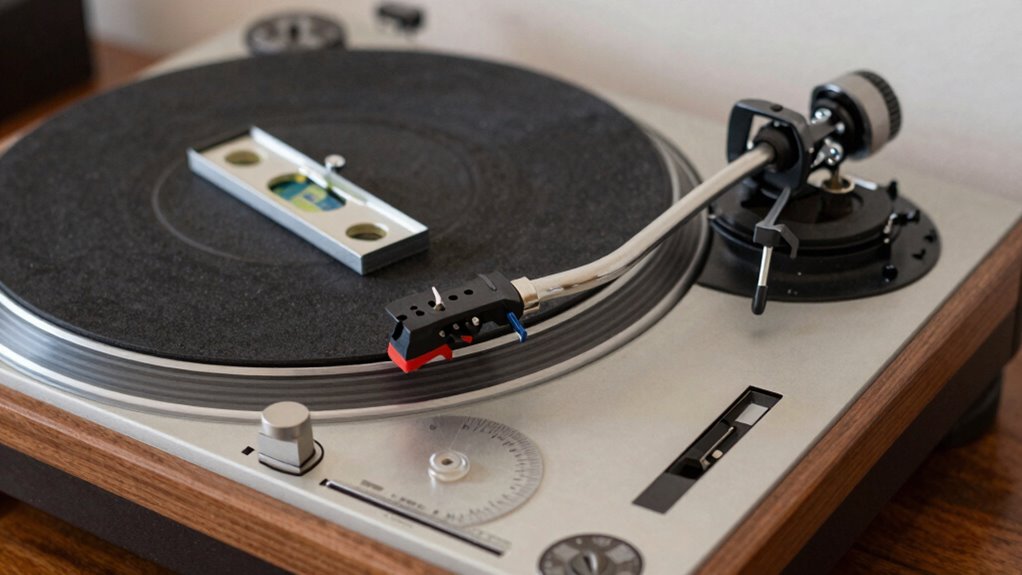
Use a Spirit Level
Using a spirit level is a simple but vital step to guarantee your turntable is perfectly horizontal. Place the spirit level on the plinth or a stable surface of your turntable. Watch the bubble indicator closely; it should sit centered between the marked lines. If it’s off-center, adjust the turntable’s position until the bubble rests precisely in the middle. This ensures the turntable is level, which is essential for accurate playback and tracking. A properly leveled turntable minimizes uneven wear on your stylus and records, preventing skewed sound or distortion. Regularly checking the level can help maintain optimal performance over time. Keep in mind, using a reliable spirit level makes the process straightforward and precise, helping you achieve ideal setup and the best possible listening experience.
Check Surface Flatness
Before you start playing records, it’s essential to check that your turntable’s surface is perfectly flat. Surface irregularities can cause tracking issues and distort sound. To do this, place a spirit level on the platter or plinth and verify stability. Ensure the material of your turntable is stable; some materials are prone to warping or bending, affecting flatness. Use the following table to assess your setup:
| Surface Condition | Effect on Playback |
|---|---|
| Flat and stable | Accurate tracking and sound |
| Irregular or warped | Increased skipping and distortion |
If you detect surface irregularities, consider replacing or stabilizing your turntable’s platform. Material stability is key to maintaining a flat surface for ideal audio performance, especially if your turntable is made from warping-prone materials.
Adjust Turntable Feet
Ensuring your turntable is level is key to achieving accurate playback. Start by checking the surface with a spirit level, then adjust the turntable feet accordingly. Properly aligned feet provide stability, preventing unwanted vibrations that can distort sound. Focus on vibration damping by making sure each foot firmly contacts the surface without wobbling. If your turntable has adjustable feet, turn them slowly until the level bubble centers. If not, consider adding shims or isolators to improve stability and vibration control. Stable feet reduce resonance and movement, ensuring the stylus tracks correctly and enhances sound clarity. Regularly recheck your setup, especially if you move your turntable, to maintain ideal alignment and playback quality. Understanding vibration control can help prevent sound distortion and improve overall listening experience.
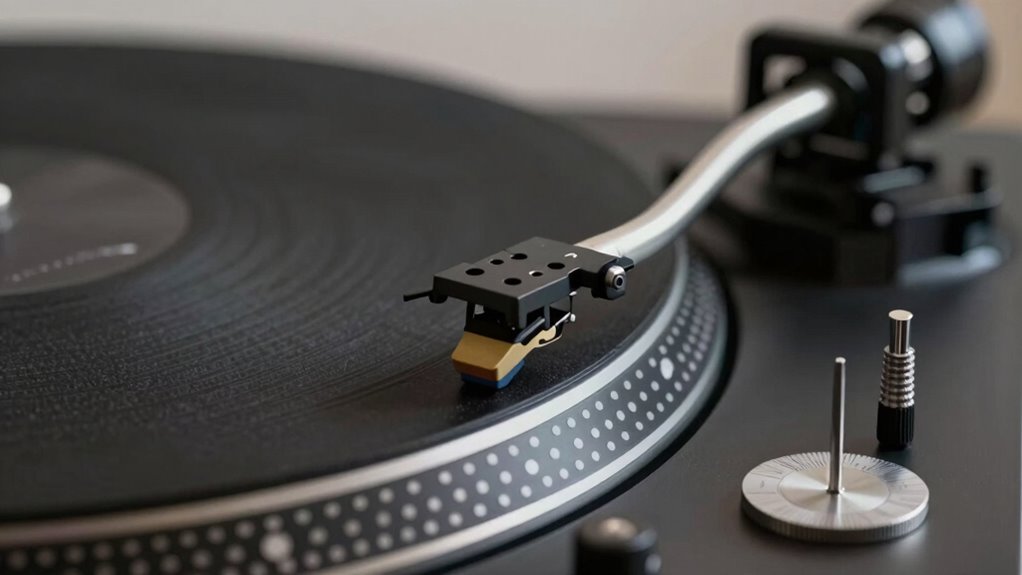
How to Set the Correct Tracking Force
To set the correct tracking force, start by locating the tracking force dial on your turntable. Use a force gauge to measure the exact amount, then adjust the counterweight accordingly. This guarantees your cartridge tracks properly without causing damage or skipping. Proper alignment is essential for optimal sound quality and cartridge longevity.
Locate Tracking Force Dial
Locating the tracking force dial on your turntable is a straightforward step that guarantees your cartridge applies the correct pressure to your records. Usually, it’s a small knob or screw near the tonearm base. Adjusting this dial helps set the right cartridge weight, ensuring ideal performance and record safety. Being familiar with trusted resources can also help verify the proper settings for your specific turntable model.
| Step | Tip |
|---|---|
| Find the dial | Usually near the tonearm base |
| Check for markings | Indicator for precise setting |
| Turn carefully | Use gentle adjustments |
| Confirm the setting | Match manufacturer’s recommended tracking force |
| Avoid force | Too much pressure risks record damage |
Use a Force Gauge
Have you ever wondered if your turntable’s tracking force is set correctly? Using a force gauge guarantees you get the right amount of pressure on your stylus, which directly impacts alignment accuracy. A precise force gauge helps you avoid too much or too little force, preventing record wear or skipping. When measuring, keep these points in mind:
- Always zero the force gauge before use for accurate readings
- Gently lower the stylus onto the gauge to avoid pressure fluctuations
- Adjust the tracking force until the gauge reads the manufacturer’s recommended value
- Being aware of passive voice usage can help make your instructions clearer and more direct.
Adjust With Counterweight
Adjusting the counterweight is the vital step to setting your turntable’s correct tracking force. First, balance the tonearm by gently moving it until it floats horizontally, making certain it’s perfectly level. Once balanced, turn the counterweight to zero, then rotate it forward or backward to apply the correct amount of tracking force as specified by your cartridge manufacturer. This process is essential for proper tonearm balancing and to prevent unnecessary wear. Properly tracking force ensures that your stylus maintains optimal contact with the record groove. After setting the tracking force, adjust the anti skate to match this force, which helps keep the stylus centered in the groove. Correct anti skate adjustment minimizes distortion and enhances playback. Taking these steps ensures your cartridge tracks properly and prolongs its lifespan, delivering ideal sound quality from your turntable.
Adjust Your Tonearm and Anti-Skate for Perfect Tracking
To achieve the best sound quality and prevent unnecessary record wear, you need to carefully set your tonearm’s balance and anti-skate. Proper tonearm calibration ensures the stylus tracks accurately, reducing distortion and record damage. Adjust your anti-skate to match the cartridge’s tracking force, keeping the stylus centered in the groove. When done correctly, your records will sound clearer, and the stylus will last longer. Remember these key points:
- Ensure the tonearm is perfectly balanced before setting tracking force
- Match anti-skate adjustment with your cartridge’s tracking force
- Regularly recheck calibration for consistent performance
Focusing on these details helps maintain ideal tracking and sound quality, preventing uneven wear and distortion over time. Proper tonearm calibration and anti-skate adjustment are essential for a seamless listening experience.
Common Turntable Setup Mistakes and How to Avoid Them
Many common turntable setup mistakes stem from overlooked details or improper calibration steps. One frequent error is neglecting stylus cleaning, which can cause distortion and record damage. Regularly cleaning the stylus guarantees superior sound quality and reduces wear on your records. Another mistake is ignoring proper record maintenance; dirty or scratched records can lead to skipping and increased stylus wear. Inadequate attention to these areas impacts sound and shortens equipment lifespan. Avoid rushing through setup; take time to inspect and maintain your records and stylus. Also, guarantee your turntable is level and your tonearm is correctly balanced. By focusing on these often-overlooked details, you minimize setup errors and enjoy a better listening experience. Proper maintenance and calibration are key to longevity and sound quality.
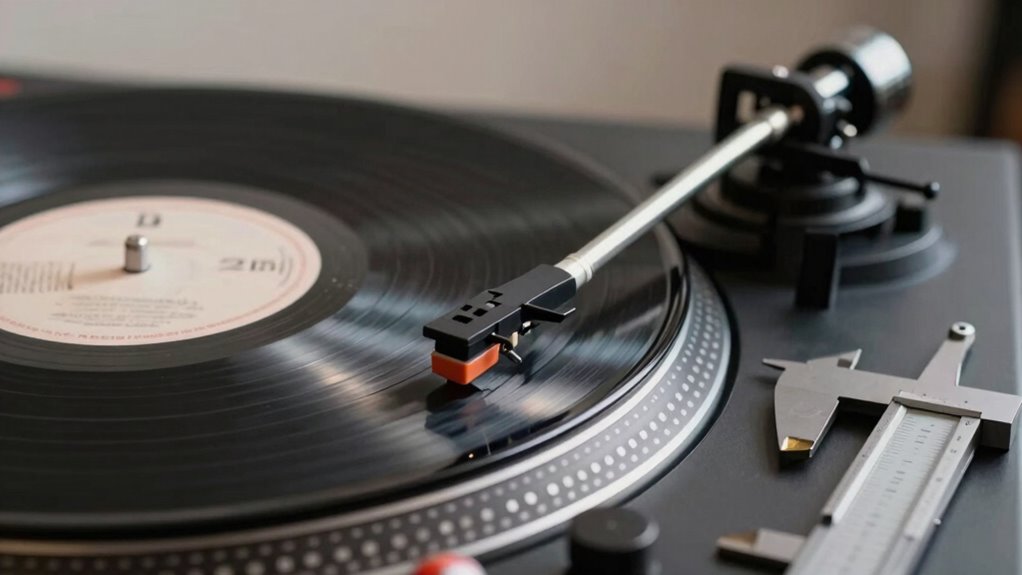
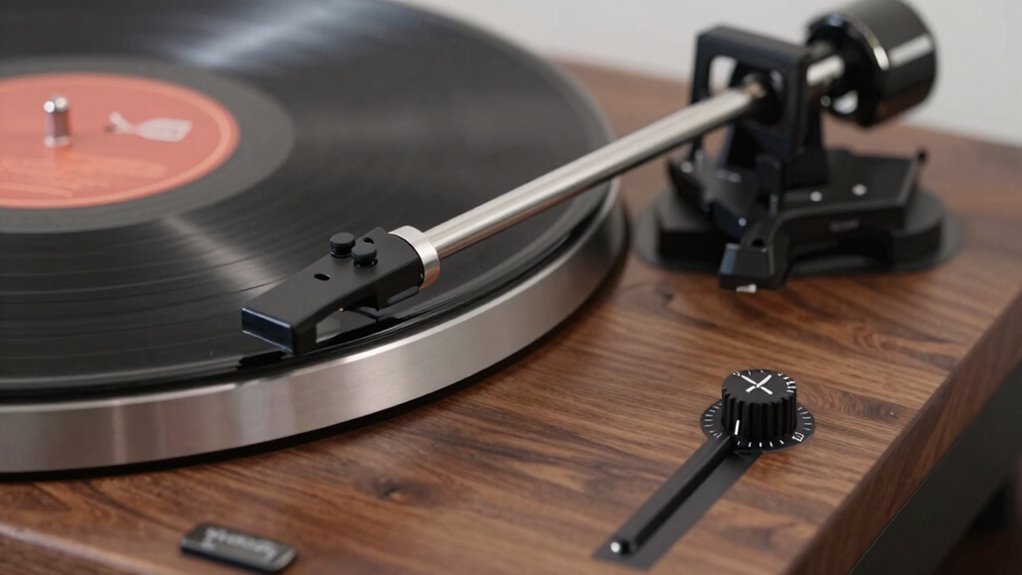
Essential Tools for Accurate Turntable and Cartridge Alignment
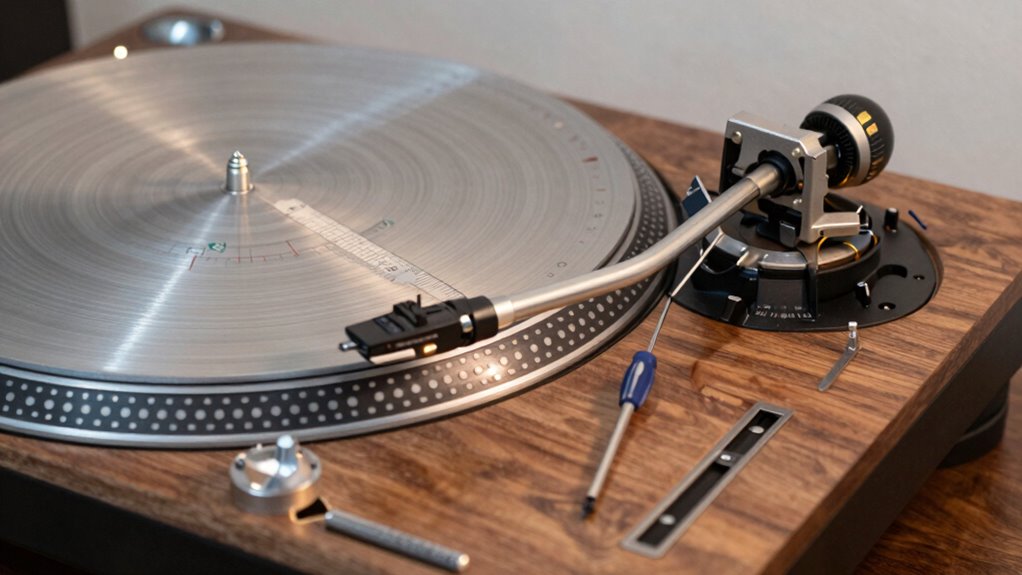
Having the right tools makes aligning your turntable and cartridge much easier. Alignment gauges and calibration tools help guarantee everything is set correctly for ideal sound. With proper adjustment techniques, you can achieve the best possible listening experience.
Alignment Gauges and Tools
Achieving accurate turntable and cartridge alignment relies heavily on the right tools, and alignment gauges are essential for this task. These gauges help you precisely set cartridge calibration and ensure your tonearm is properly balanced. Using the correct tools prevents tracking errors and preserves your records.
Key tools include:
- Alignment protractors for setting the cartridge angle accurately
- Baerwald or Stevenson gauges for correct overhang and offset
- Bubble levels or tonearm balances to achieve proper tonearm weight distribution
These tools make it easier to identify misalignments and correct them efficiently. Proper use guarantees ideal sound quality and extends your equipment’s lifespan. Remember, accurate alignment starts with the right gauges and careful attention to detail.
Calibration and Adjustment Techniques
To guarantee your turntable and cartridge are perfectly aligned, you need to employ effective calibration and adjustment techniques using the right tools. Start by carefully cleaning your stylus to prevent tracking issues and record damage. Next, select a quality mat that reduces vibrations and improves playback stability. Use alignment gauges to fine-tune cartridge positioning, ensuring proper overhang and tracking angle. Regularly check and adjust tonearm height for excellent contact with the record surface. Proper calibration minimizes distortion and maximizes sound quality.
| Tool | Purpose |
|---|---|
| Stylus cleaner | Maintains stylus cleanliness for clarity |
| Alignment gauge | Ensures precise cartridge positioning |
| Mat selection | Reduces vibrations, improves playback quality |
How to Test and Fine-Tune Your Turntable Setup
Before you start listening, it’s essential to test and fine-tune your turntable setup to guarantee ideal sound quality. First, check your stylus pressure with a gauge, ensuring it matches manufacturer specs. Next, verify platter stability by gently nudging it; it should remain steady without wobbling. To enhance performance, consider these points:
- Adjust stylus pressure for accurate tracking and minimal record wear
- Ensure the platter spins evenly and remains stable during playback
- Use a spirit level to confirm your turntable is perfectly horizontal
Fine-tuning these factors improves sound clarity and reduces unwanted noise. Regularly testing and adjusting your setup helps maintain optimal performance and extends the lifespan of your records and stylus.
Troubleshooting Sound and Record Wear Problems From Misalignment
Misalignment of your turntable’s components can cause sound issues and accelerate record wear. When the stylus isn’t properly aligned, it can lead to uneven stylus wear and increased record damage. To troubleshoot, check for distorted sound, skipping, or excessive record noise. Correct alignment ensures the stylus tracks the grooves properly, reducing wear and preserving sound quality.
| Issue | Cause | Solution |
|---|---|---|
| Distorted sound | Misaligned cartridge or stylus | Re-align cartridge and stylus |
| Record skipping | Incorrect tracking force | Adjust tracking force |
| Excessive record wear | Stylus not tracking properly | Verify proper alignment and setup |
| Stylus damage | Misaligned stylus or debris | Clean stylus and realign cartridge |
Tips to Keep Your Turntable Aligned and Playing Its Best

Keeping your turntable properly aligned guarantees consistent sound quality and minimizes record wear over time. To achieve this, focus on vibration damping to reduce unwanted resonances and ensure stable playback. Regularly check and adjust your tonearm balancing to prevent tracking issues and uneven record wear. Proper tonearm weight distribution is vital for sound fidelity. Additionally, secure all components and avoid external vibrations that can affect playback.
Proper turntable alignment and vibration control ensure optimal sound quality and record longevity.
- Use vibration damping materials around your turntable
- Recheck tonearm balance periodically
- Keep your setup on a stable, vibration-free surface
Frequently Asked Questions
How Often Should I Realign My Turntable and Cartridge?
You should realign your turntable and cartridge whenever you notice sound distortion, or at least every 6 to 12 months, depending on usage. Proper alignment helps extend your cartridge lifespan and guarantees ideal sound quality. Regularly checking alignment frequency is essential, especially after moving or bumping your turntable. Doing this keeps your setup precise, prevents unnecessary wear, and guarantees you enjoy the best listening experience over time.
Can Improper Alignment Cause Permanent Damage to My Records?
Ever wondered if improper alignment can cause permanent damage? Yes, it can. Misaligned cartridges lead to uneven record wear and stylus damage, potentially ruining your cherished vinyl. When your turntable isn’t properly aligned, the stylus doesn’t track smoothly, increasing the risk of scratches and warping. Regularly checking and adjusting alignment helps preserve your records and stylus, ensuring they stay in top condition for years to come.
What Signs Indicate My Turntable Needs Realignment or Adjustment?
If your stylus keeps skipping or you notice increased vibration noise, it’s a sign your turntable needs realignment. These issues often stem from misaligned tonearms or improperly set tracking force. You might also see uneven wear on your records or experience muffled sound quality. By checking and adjusting your tonearm and stylus alignment, you can restore peak performance and prevent potential damage to your records.
Are There Specific Brands or Models That Are Easier to Align?
Think of turntable brands like cars—some are easier to tune, others more complex. If you want brand compatibility and model simplicity, consider brands like Audio-Technica or Pro-Ject, known for straightforward setups. I once helped a friend with a basic model from Audio-Technica, and it aligned effortlessly. Choosing a simpler model with good reviews makes the process smoother, ensuring your turntable performs at its best without frustration.
How Does Temperature or Humidity Affect Turntable Setup Accuracy?
Temperature and humidity can impact your turntable setup by causing environmental instability, which affects calibration accuracy. Fluctuations may lead to misalignment or tracking issues over time. To maintain ideal performance, you should regularly check and recalibrate your turntable, especially if your environment experiences significant changes. Keeping your setup in a stable, controlled space minimizes these effects, ensuring consistent sound quality and precise alignment.
Conclusion
Proper turntable alignment isn’t just about avoiding record wear; it’s the secret to revealing your vinyl’s true potential. Many believe perfect setup is complicated or unnecessary, but research shows that even small misalignments can degrade sound quality over time. By taking the time to align your cartridge, level your turntable, and fine-tune your setup, you’ll enjoy richer, clearer sound and extend your records’ lifespan. Trust the process—your ears will thank you.