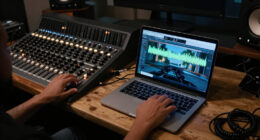


Set up a wireless microphone system that sends a clear, stable signal to a mixer, powered speaker, camera, or recorder. This guide is for beginners preparing a handheld, lavalier, or headset microphone for a meeting, presentation, rehearsal, or small event. Allow 20-40 minutes, including a sound check; crowded venues or multi-microphone setups may take longer.

Get audio and creator gear delivered free with Prime
- Fast, free delivery on millions of items
- Prime Video, Amazon Music and more included
- Member-only deals all year

Phenyx Pro PTU-7000-4H 4-Channel UHF Wireless Microphone System
- ✔ Channels: 4
- ✔ Frequency range: 530–580 MHz
- ✔ Selectable frequencies: 40 per channel; 160 total

Phenyx Pro PTU-71-2H Dual UHF Handheld Wireless Microphone System
- ✔ Channels: 2
- ✔ Selectable frequencies: 100 per channel
- ✔ Frequency ranges: Channel 1: 536.57–561.32 MHz; Channel 2: 562.37–587.12 MHz
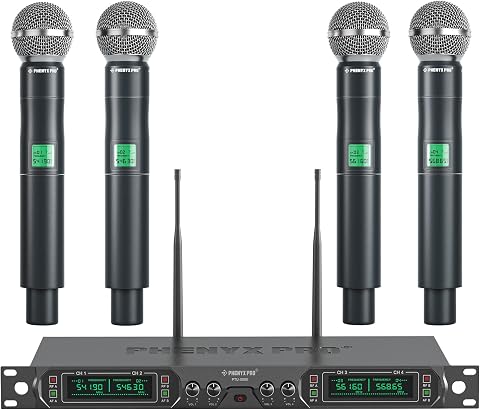
Phenyx Pro PTU-5000-4H 4-Channel UHF Wireless Microphone System with 4 Handheld Microphones
- ✔ Channels: 4
- ✔ Frequencies: 541.9, 546.3, 561.6, and 568.65 MHz
- ✔ Operating range: Up to 260 ft
Difficulty: Beginner | Time: 20-40 minutes
What You’ll Need
Tools & Materials:
- Compatible wireless microphone transmitter and receiver
- Microphone capsule, lavalier, or headset designed for the transmitter
- Fresh batteries or charged transmitter and receiver batteries
- Audio cable suited to the receiver output and sound equipment input
- Mixer, powered speaker, camera, or recorder with a compatible audio input
- Headphones or speakers for a sound check
Knowledge:
- Basic ability to connect audio cables and adjust input level
- Access to the receiver and connected sound equipment controls
Check that the transmitter and receiver are from the same compatible system and can operate on an available frequency in your location. Wireless frequency rules vary by country and may change. Consult the system manual and local regulator before selecting a band. For several microphones, check that their frequencies are coordinated to avoid interference with one another.
Phenyx Pro PTU-7000-4H 4-Channel UHF Wireless Microphone System
For groups that need four handheld microphones and room to manage them individually, the PTU-7000-4H is the most adaptable system here. Auto Scan helps identify a usable frequency, IR Sync pairs microphones with the receiver, and the lock function can help keep settings from being changed accidentally once a setup is ready. Those conveniences distinguish it from the PTU-5000-4H, which offers four microphones but uses fixed frequencies.Its four independent XLR outputs let a mixer operator route or adjust each mic separately; the mixed 1/4-inch output provides a simpler connection option. The stated range reaches up to 328 feet under line-of-sight conditions, matching the PTU-71-2H’s claim and exceeding the PTU-5000-4H’s stated 260 feet. Real venues can shorten wireless range, so placement and interference still matter.The tradeoff is that four-channel flexibility requires more setup attention and four microphones mean more batteries to manage. Each handheld uses AA batteries, and the long-distance figure should not drive a decision without considering the room. Choose this system when frequency coordination and separate mixer control matter; the PTU-71-2H is a simpler fit if two channels are enough.
Pros:
- Auto Scan, IR Sync, and a lock function support more organized setup and pairing.
- Four XLR outputs allow separate routing or adjustment at a mixer.
- A mixed 1/4-inch output provides an additional connection option.
- Stated line-of-sight range is up to 328 feet.
Cons:
- The 328-foot range is a line-of-sight claim and can vary in real venues.
- The four handheld microphones require eight AA batteries.
Best for: Event hosts, small venues, and performers who need four handheld mics with frequency scanning and separate mixer channels.
Not ideal for: Buyers who only need one or two microphones, or who want a system that avoids managing AA batteries and venue-specific RF conditions.
Bottom line: We recommend the PTU-7000-4H for four-microphone setups where assisted frequency coordination and individual XLR routing justify the extra battery and setup needs.
“We recommend the PTU-7000-4H for four-microphone setups where assisted frequency coordination and individual XLR routing justify the extra battery and setup needs.”
Phenyx Pro PTU-71-2H Dual UHF Handheld Wireless Microphone System
The PTU-71-2H makes the most sense when two microphones cover the job: a presenter and interviewer, two ceremony speakers, or a small performance. Its Auto Scan and frequency locking provide more coordination help than the PTU-5000-4H’s fixed-frequency approach, and the system is specified to support up to 16 transmitters operating simultaneously. That makes it the more flexible choice of the two-channel options for users who may expand their wireless setup.Both handhelds use cardioid dynamic microphones, a pattern designed to focus on the person speaking and reduce some surrounding sound. The receiver is metal, and replaceable microphone heads can help with maintenance. Its stated 290–328-foot operating range is line of sight, similar at the upper end to the PTU-7000-4H. Unlike that four-channel model, though, this receiver only covers two mics, so it is not the right choice for a four-person panel.Its two-channel format keeps the system focused, but the handhelds still rely on AA batteries and the receiver is a substantial 2.7 kg. For a group that needs four microphones, stepping up to the PTU-7000-4H brings independent XLR outputs and IR Sync; for smaller events, this model avoids paying in complexity for channels you may not use.
Pros:
- Auto Scan helps find a lower-interference frequency, with frequency locking available.
- Supports up to 16 transmitters operating simultaneously.
- Cardioid dynamic microphones are designed to focus on vocals and reduce ambient pickup.
- Metal receiver and replaceable microphone heads support maintenance.
Cons:
- The stated operating range depends on line-of-sight conditions.
- Handheld microphones require AA batteries.
Best for: Presenters, small venues, and event organizers who regularly need two handheld microphones and want scanning support.
Not ideal for: Panels or performances needing four simultaneous handhelds, or buyers seeking rechargeable transmitters.
Bottom line: We would choose the PTU-71-2H when two microphones and frequency scanning are the priority, while moving to the PTU-7000-4H for four-person coverage.
“We would choose the PTU-71-2H when two microphones and frequency scanning are the priority, while moving to the PTU-7000-4H for four-person coverage.”
Phenyx Pro PTU-5000-4H 4-Channel UHF Wireless Microphone System with 4 Handheld Microphones
When the requirement is simply to put four handheld microphones in a group’s hands, the PTU-5000-4H offers a direct setup: four channels, individual volume controls, and four XLR outputs. That makes it more suitable than the PTU-71-2H for panels and group vocals, where two channels would be limiting. Its memory switch retains the last settings, which can save time when the same system is set up repeatedly.The main compromise is frequency coordination. The PTU-5000-4H lists four operating frequencies and is not intended for multi-set operation, while the PTU-7000-4H adds Auto Scan and IR Sync with selectable frequencies per channel. If several wireless systems will share a venue, the latter gives buyers more coordination tools. The PTU-5000-4H’s stated range of up to 260 feet is also shorter than the two alternatives’ upper claims, though actual performance depends on conditions.Each mic has a dynamic cardioid cartridge, and the metal receiver provides individual controls. However, the system needs an amplifier or speaker for sound output, just as a receiver-based setup needs a compatible audio path. Its stated battery life is up to eight hours, so users planning longer events should keep spare AA batteries ready. This is a practical choice for a recurring four-mic setup with known frequencies, not the most flexible option for changing venues or multiple wireless systems.
Pros:
- Four handheld microphones cover panels and group performances.
- Individual volume controls and four XLR outputs support channel-by-channel handling.
- Memory switch retains the last settings for repeat setups.
- Metal receiver and cardioid dynamic capsules are suited to vocal use.
Cons:
- Fixed frequencies are not intended for multi-set operation.
- The stated range is up to 260 feet, below the other systems’ upper claims.
- Requires an amplifier or speaker for sound output and uses AA batteries.
Best for: Community events, group vocals, and recurring presentations that need four microphones with simple individual level controls.
Not ideal for: Users coordinating multiple wireless sets, needing scanning assistance, or expecting a longer stated operating range.
Bottom line: We recommend the PTU-5000-4H for repeat four-mic events where straightforward controls matter more than scanning and multi-system coordination.
“We recommend the PTU-5000-4H for repeat four-mic events where straightforward controls matter more than scanning and multi-system coordination.”
As an Amazon Associate we earn from qualifying purchases.
Before You Start
Place the receiver where it can be seen and reached, with a clear path to the microphone’s usual position. Keep it away from large metal objects, Wi-Fi access points, computers, and other radio transmitters when practical. Do not cover its antennas. Turn down or mute the mixer or speaker before connecting cables to prevent pops. If you are setting up at an event venue, scan for a clear frequency at the venue, not only at home.
Step-by-Step Instructions
Step 1: Check compatibility and power
Read the labels and manuals for the transmitter and receiver. Confirm they belong to the same compatible system and band, then check which microphone capsule or headset connector the transmitter accepts. Install fresh batteries or fully charge both units. Turn them on and confirm that each display or status light indicates normal operation.
Tip:Use the battery type specified by the manufacturer. Some rechargeable batteries show a different voltage than disposable batteries, which can make the transmitter’s battery display inaccurate.
Check: The transmitter and receiver power on without low-battery warnings, and the microphone connector fits the transmitter correctly.
Step 2: Connect the receiver to the sound equipment
Keep the mixer, speaker, camera, or recorder muted or turned down. Connect the receiver’s audio output to a suitable input using the cable type specified in the receiver manual. Use a microphone input for a mic-level output or a line input for a line-level output. If the receiver has a selectable output level, set it to match the input. Connect the receiver’s power supply if needed.
Tip:A receiver output set to line level can overload a microphone input. If the sound is harsh or distorted even at a low input setting, check the output and input types before raising or lowering other controls.
Check: The cable is firmly seated at both ends, the receiver is powered, and the sound equipment is still muted or set low.
Step 3: Choose a clear frequency
Turn on the receiver and use its channel scan or frequency scan function if available. Follow the system’s instructions to select an open channel, then set the transmitter to the same channel or frequency. If the units support infrared or automatic synchronization, point the transmitter’s sync window at the receiver and start synchronization as directed. For multiple systems, coordinate frequencies using the manufacturer’s guidance rather than assigning channels at random.
Tip:Scan after arriving at the venue and before the audience arrives if possible. Nearby wireless systems can change which frequencies are usable.
Check: The transmitter and receiver show the same channel or frequency, and the receiver indicates a radio-frequency signal when the transmitter is on.
Step 4: Position the receiver and microphone
Set the receiver near the area where the microphone will be used, with antennas extended and unobstructed. Keep it out of cabinets and behind large objects. Put the microphone on the speaker or performer, or hold it at the intended distance from the mouth. For a lavalier, clip it securely near the upper chest and route its cable so clothing does not rub across the microphone. For a headset, place the capsule near the corner of the mouth without touching the skin.
Tip:Human bodies can block radio signals. Avoid placing the receiver behind the person using the microphone, especially when the transmitter is worn on the opposite side.
Check: The microphone is secure and positioned for use, while the receiver has a clear line of sight to the area where the transmitter will move.
Step 5: Set the audio input level
Unmute the sound equipment at a low level. Speak or sing into the microphone at the loudness and distance expected during use. Raise the receiver output or mixer input gain gradually until the meter shows a healthy signal without reaching the clipping or peak indicator. Adjust the speaker or headphone volume separately to a comfortable level. If the system has transmitter sensitivity or gain, adjust it according to the manual so the transmitter does not distort on loud speech.
Tip:Do not compensate for a weak signal by turning every control to maximum. Set the transmitter, receiver output, mixer input gain, and listening volume in sequence, checking for distortion at each stage.
Check: Normal speech is clearly audible, the meter responds consistently, and loud speech does not trigger clipping or sound rough.
Step 6: Test the full operating area
Have someone speak into the microphone while walking through the full area where it will be used, including the farthest point and likely corners. Listen through the actual speakers or headphones and watch the receiver’s signal indicators. Pause at spots where the signal weakens, then move the receiver or antennas to improve coverage. Keep cables secure and make sure the receiver remains powered and visible to the operator.
Tip:Perform this check with the room in its normal setup. People, furniture, and closed doors can affect reception.
Check: Speech remains clear throughout the working area, without repeated dropouts, bursts of static, or sudden level changes.
Step 7: Lock settings and prepare for use
Save or lock the selected channel if the system offers a lock function. Mark each transmitter and receiver pair when using multiple microphones. Confirm the microphone mute switch, mixer mute, battery status, and output routing. Keep spare batteries nearby and tell the operator how to mute the microphone without changing its frequency or gain.
Tip:Recheck battery status shortly before the event, particularly if the system has been powered on during setup for a long time.
Check: The system stays on the selected frequency, reaches the sound equipment at the intended level, and is ready for the speaker to use.
Common Mistakes to Avoid
- Setting the transmitter and receiver to different channels. — Compare the channel or frequency shown on both units after scanning or synchronization, and repeat the sync if they do not match.
- Connecting a line-level output to a microphone input and getting distorted audio. — Match the receiver output level to the sound equipment input, and lower the receiver output if the input overloads.
- Putting the receiver where the signal is blocked by a body, wall, or metal object. — Place it in the open near the use area, then walk-test the full coverage zone.
- Skipping a venue sound check or relying on old batteries. — Scan at the venue and test with fresh or fully charged batteries before the microphone is needed.
Troubleshooting
Problem: The receiver shows no radio-frequency signal.
Solution: Confirm that both units are powered and set to the same frequency. Repeat the synchronization or set the channel manually. Move the transmitter closer to the receiver and check that the receiver antennas are connected and unobstructed.
Problem: The receiver shows a signal, but no sound comes from the speakers or recorder.
Solution: Check the microphone mute switch, receiver audio output, cable connections, mixer input selection, and mute controls. Speak into the microphone and watch the receiver’s audio meter; if it moves, trace the signal from the receiver into the sound equipment.
Problem: Audio cuts out or has bursts of static.
Solution: Rescan for a clear frequency, move the receiver higher or closer to the use area, and clear obstructions around its antennas. Repeat the walk test. For multiple systems, coordinate frequencies to reduce interference.
Problem: Audio sounds distorted, weak, or noisy.
Solution: Check that the receiver output and input type match. Reduce transmitter sensitivity if loud speech distorts; raise mixer input gain gradually if the signal is weak. Replace weak batteries and listen for clothing rubbing against a lavalier.
What Success Looks Like
The microphone sends clear speech to the intended sound equipment across the full working area. The receiver shows a stable radio signal, the audio meter responds without clipping, and listening tests reveal no repeated dropouts, static bursts, or unwanted rubbing noise.
Next Steps
After use, mute the sound equipment before disconnecting cables. Turn off the transmitter and receiver, remove disposable batteries if the system will be stored for a long time, and charge rechargeable units according to the manual. Store the microphone, cable, and receiver in a case. Repeat the frequency scan and coverage test whenever the system moves to a new venue or another wireless system is added.
Frequently Asked Questions
Can I use any wireless transmitter with any receiver?
No. The units must be designed to work together and share a compatible frequency band and system format. Check the manufacturer model information before combining equipment.
How far can a wireless microphone reach?
Range depends on the system, antenna placement, obstacles, and radio interference. Use the manufacturer’s range as a guide, then test the actual room by walking the full operating area.
Why does the receiver show radio signal but no audio?
The radio link may be working while the microphone is muted, disconnected, or routed incorrectly. Check the transmitter mute, microphone connection, receiver audio meter, cable, mixer input, and mute controls in that order.
Should I use the receiver’s microphone output or line output?
Use the output type that matches the sound equipment input. A microphone output typically connects to a mic input; a line output typically connects to a line input. Check the manuals when the labels or level controls are unclear.