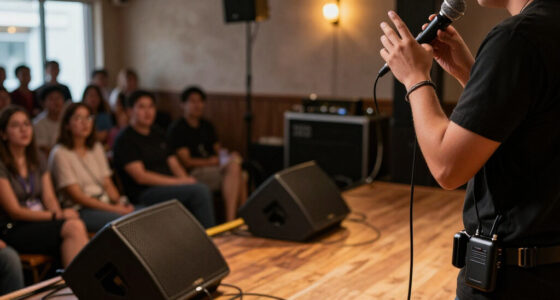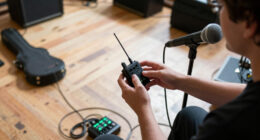


This guide walks you through setting up a wireless microphone system from unboxing to a clean, dropout-free signal. You will connect the receiver, scan for an open frequency, sync or match the transmitter, set gain levels, and verify reliable operation before your event or session. It is written for beginners running a single system or a small multi-microphone setup for presentations, performances, worship services, video production, or band rehearsals. No prior RF (radio frequency) knowledge is required — the process below relies on the automatic features built into most modern systems. Expect the first setup to take 45 to 90 minutes, including testing. Once configured, subsequent setups take ten minutes or less.

Get audio and creator gear delivered free — and shop member deals
- Fast, free delivery on millions of items
- Access to Prime Big Deal Days deals on October 6–7
- Prime Video, Amazon Music and more included

Phenyx Pro PTU-71-2H Dual UHF Wireless Handheld Microphone System
- ✔ Model: PTU-71-2H
- ✔ Channels: 2
- ✔ Selectable frequencies: 100 per channel

JBL Wireless Two-Microphone System with Dual-Channel Receiver
- ✔ Microphones: 2 wireless handhelds
- ✔ Receiver: Rechargeable dual-channel UHF
- ✔ Playback time: Up to 6 hours
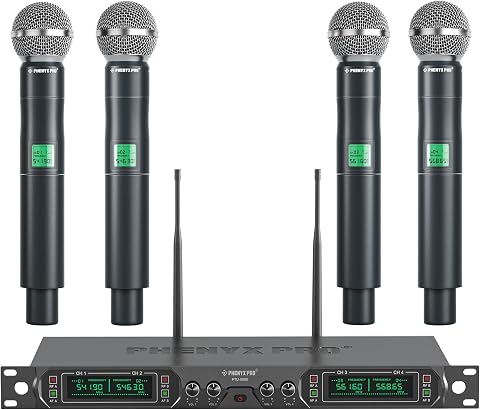
Phenyx Pro PTU-5000-4H 4-Channel UHF Wireless Microphone System
- ✔ Channels: 4
- ✔ Wireless band: UHF
- ✔ Fixed frequencies: 541.9 / 546.3 / 561.6 / 568.65 MHz
Difficulty: Beginner | Time: 45-90 minutes
What You’ll Need
Tools & Materials:
- Wireless microphone system (receiver plus handheld, lavalier, or headset transmitter)
- Fresh batteries of the correct type (usually AA or rechargeable pack) — at least one spare set
- Audio mixer, amplifier, powered speaker, camera, or computer to receive the audio
- Appropriate audio cable: XLR or 1/4-inch (TS/TRS) for mixers and speakers, or 3.5mm/USB depending on your device
- Antennas included with the receiver (and antenna mounts if the receiver sits in a rack or behind equipment)
- Optional but recommended: headphones connected to your mixer or audio interface for monitoring
Knowledge:
- Basic ability to connect audio cables and power on equipment
- Familiarity with your mixer or speaker’s volume and input controls (beginner level is fine)
- No RF or frequency coordination knowledge needed
Check which frequency band your system uses before your event. In the United States, systems sold after 2020 should operate in the 900 MHz, 1.9 GHz, 2.4 GHz, or 600 MHz ranges that remain legal for wireless mics; older 700 MHz equipment is prohibited and may not work. If you bought the system new and it matches your region’s regulations, you are fine. If renting or borrowing, ask the owner which band it uses and confirm it is legal where you will operate.
Phenyx Pro PTU-71-2H Dual UHF Wireless Handheld Microphone System
The PTU-71-2H earns our top spot because it solves the problem that trips up most wireless systems in real venues: finding a clean frequency. With auto scan and IR synchronization across 100 selectable frequencies per channel, this system adapts to RF-crowded spaces like hotels, schools, and convention halls far better than the fixed-frequency PTU-5000-4H. That flexibility is the core reason it sits at number one.Its 290–328 ft line-of-sight range is the longest in this lineup, and the metal-bodied handhelds with replaceable microphone heads mean a dropped mic doesn’t end the night — or the product’s lifespan. The cardioid dynamic capsules keep ambient noise and feedback in check, which matters when you’re running sound in a reverberant hall. Compared with the JBL system, the tradeoff is clear: you get double the range and true frequency management, but you give up plug-and-play simplicity and a rechargeable receiver. Setup takes a few more minutes, and the four AA batteries are an ongoing cost. Still, for anyone hosting events where reliability matters more than convenience, this pick makes the most sense.
Pros:
- Auto scan and IR sync make finding clear frequencies straightforward even in crowded venues
- 290–328 ft line-of-sight range is the longest of the three systems compared
- Metal construction with replaceable microphone heads improves longevity
- Complete accessory bundle includes receiver, cables, adapters, antennas, and batteries
Cons:
- Stated range depends heavily on line-of-sight conditions and drops with obstacles
- Requires four AA batteries, adding recurring cost over rechargeable alternatives
Best for: DJs, wedding hosts, churches, and event speakers who need dependable two-mic performance in unpredictable RF environments
Not ideal for: Casual home karaoke users who want the simplest possible setup with no frequency configuration
Bottom line: The best-balanced system here, combining genuine frequency flexibility, long range, and rugged build for serious event use.
“The best-balanced system here, combining genuine frequency flexibility, long range, and rugged build for serious event use.”
JBL Wireless Two-Microphone System with Dual-Channel Receiver
If your main use case is karaoke night at home or a small backyard party, the JBL two-microphone system removes nearly every barrier between opening the box and singing. There are no frequencies to scan and no receiver batteries to buy — the rechargeable dual-channel receiver plugs into a compatible speaker and handles both voices with a true plug-and-play setup. That simplicity is exactly why it earns the beginner role in this lineup.The compromises become obvious when you compare it with the PTU-71-2H. JBL doesn’t match Phenyx’s 300-ft class range, and the receiver’s 6-hour playback time means a long event could outlast the charge — though the microphones themselves use easily replaceable AA batteries, which softens the blow. There’s also less frequency flexibility, which is fine in a living room but riskier in a venue full of other wireless gear. This model is better suited to dual-singer households and casual entertainers who value effortless setup over maximum range and RF resilience. Skip it if you’re running sound professionally; the Phenyx options are built for that world.
Pros:
- True plug-and-play setup with no frequency configuration required
- Rechargeable receiver eliminates a recurring battery cost
- Supports two microphones simultaneously through one receiver
- Microphones run on replaceable AA batteries for easy swaps
Cons:
- 6-hour receiver playback time may not last through extended events
- Shorter practical operating range than the Phenyx systems in this comparison
Best for: Home karaoke, casual parties, and anyone who wants two working microphones with zero configuration
Not ideal for: Professional event hosts or venues with heavy wireless traffic that need selectable frequencies and long range
Bottom line: The easiest path to two wireless microphones for home use, as long as your events stay short and your venue stays small.
“The easiest path to two wireless microphones for home use, as long as your events stay short and your venue stays small.”
Phenyx Pro PTU-5000-4H 4-Channel UHF Wireless Microphone System
When four people need to be heard at once — a panel discussion, a worship team, a birthday roast — a two-mic system simply isn’t enough, and that’s precisely where the PTU-5000-4H earns its place. With four handheld microphones, individual volume controls per channel, and four XLR outputs on the receiver, it gives an actual sound operator real mix control that neither the PTU-71-2H nor the JBL system can offer.The tradeoff is fixed frequencies: unlike the PTU-71-2H’s 100 selectable frequencies per channel, this system runs on four preset UHF frequencies and isn’t designed for multi-set operation. In practice, that means one system per venue works fine, but stacking a second unit risks interference. The all-metal receiver and snap-on antennas make it road-worthy, and the included batteries, cables, and mounting gear mean you’re not shopping for accessories before the gig. Just remember it needs an amplifier or powered speaker — like both other picks here, it produces no sound on its own. For group-driven events on a single-system basis, this option stands out as the clear choice in this lineup.
Pros:
- Four channels with individual volume controls enable genuine multi-microphone mixing
- Four XLR outputs support professional integration with mixers and PA systems
- All-metal receiver construction and snap-on antennas hold up to regular transport
- Complete bundle includes four mics, batteries, cables, and mounting accessories
Cons:
- Fixed frequencies prevent running multiple systems together
- Requires an external amplifier or powered speaker for output
- 8-hour battery life trails the PTU-71-2H’s 16 hours
Best for: Panels, worship services, school events, and parties where three or four speakers or singers perform together
Not ideal for: Users who need to run multiple systems simultaneously or want flexible frequency selection in RF-busy venues
Bottom line: The only option here that scales to four voices, trading frequency flexibility for raw channel count and mixing control.
“The only option here that scales to four voices, trading frequency flexibility for raw channel count and mixing control.”
As an Amazon Associate we earn from qualifying purchases.
Before You Start
Do the physical placement thinking now, before any cables are run. The receiver should sit within line of sight of wherever the microphone will be used, elevated if possible, and away from large metal objects, LED walls, Wi-Fi routers, and other transmitters. Wireless microphones need a clear radio path — every wall, body, and metal rack door between the transmitter and receiver weakens the signal. Plan to keep the transmitter and receiver within roughly 30 to 60 meters (100 to 200 feet) for reliable performance, less indoors with thick walls.
Install fresh batteries in the transmitter before you begin. Low batteries are the single most common cause of wireless microphone failures mid-event. If your system uses a rechargeable pack, charge it fully first.
Step-by-Step Instructions
Step 1: Position the receiver and attach the antennas
Place the receiver on a stable surface near your mixer or speaker, elevated above head height if possible. Attach both antennas hand-tight if they are not already installed, and angle them upward in a V shape. Keep the receiver in the same room as the microphone whenever you can, and position it at least one meter away from Wi-Fi routers, computers, and LED video walls.
Tip: If the receiver must be hidden in a rack or cabinet, use remote antennas mounted above the audience or stage area instead. Blocked antennas are the leading cause of dropouts.
Check: Both antennas are attached, vertical or slightly splayed, and the receiver has a clear view toward the performance area.
Step 2: Connect the receiver’s audio output
Power the receiver off. Run an audio cable from the receiver’s audio output (XLR or 1/4-inch) to an input on your mixer, amplifier, or powered speaker. Set the receiver’s output switch — if it has one — to match your input: MIC level for mixer mic inputs, LINE level for line inputs or powered speakers. Connect the receiver’s power supply, then power it on.
Tip: Matching the MIC/LINE switch to your input prevents two problems at once: a hissing, overdriven input (line into mic) or an inaudibly quiet signal (mic into line).
Check: The receiver’s display lights up and shows power, frequency, and RF or audio meters.
Step 3: Power on the transmitter and check battery status
Turn on the handheld microphone or bodypack transmitter using its power switch. Check the battery indicator on its display and confirm it shows full or near-full charge. Verify that the transmitter and receiver display the same channel group if they show this information.
Tip: Note the battery type and expected runtime (printed in the manual — commonly 6 to 10 hours for alkaline AAs). Always start an event above 50 percent charge.
Check: The transmitter display is on, battery indicator is strong, and no low-battery warning is flashing.
Step 4: Scan for a clear frequency
Press the button labeled Scan, Auto Set, or Find on the receiver (name varies by brand — check the display menu). Wait for the scan to finish completely — usually 5 to 30 seconds — and then note the channel or frequency it selected as the clearest available.
Tip: Run the scan with all your other wireless equipment (Wi-Fi, other mics, in-ear monitors) powered on and operating, so the receiver sees real interference conditions. Re-scan at the venue if you configured the system elsewhere.
Check: The receiver displays a selected frequency with no interference warning icon.
Step 5: Sync or manually match the transmitter
Sync automatically if your system has an infrared (IR) port: hold the transmitter’s IR window a few centimeters from the receiver’s sync window and press Sync on the receiver. Wait for the transmitter to beep or flash, confirming it adopted the scanned frequency. If there is no IR sync, set the frequency manually: open the transmitter’s menu and enter the frequency or channel group/number to match the receiver exactly.
Tip: For multiple microphone systems, sync one mic at a time: scan, sync mic one, then re-scan and sync mic two, and so on. Never let two transmitters share one frequency — they will cancel each other out.
Check: The receiver’s RF meter shows signal when the transmitter is powered on, and both displays show the same frequency.
Step 6: Set the gain on the transmitter
Speak or sing into the microphone at the volume you will actually use during the event. Watch the receiver’s audio meter while you do, and adjust the transmitter’s gain control (sometimes labeled sensitivity) until loud moments peak near the top of the meter without hitting the limit or clip indicator. Start at -10 dB for loud singers or drums, or 0 dB for normal speech.
Tip: Set gain so the loudest expected sound just barely avoids clipping. Quiet speech can always be raised at the mixer; a clipped (distorted) signal cannot be fixed later.
Check: Loud speech or singing lights most of the audio meter bars but never triggers the clip or peak LED.
Step 7: Set the output level at the mixer or speaker
Speak normally into the live microphone while you raise the corresponding channel fader or speaker volume gradually. Stop raising the volume once it sounds appropriate for the room. Lower the mixer’s input trim first if you hear distortion, then leave the fader where it is.
Check: Speech is clear and loud enough for the space, with no distortion at normal and loud volumes.
Step 8: Walk-test the full performance area
Walk the entire area where the microphone will be used — every corner of the stage, aisle, or room — while transmitting and monitoring on headphones or through the speakers. Watch the receiver’s RF meter as you move and listen for dropouts, static, or swishing noises. Mark any weak spots you find.
Tip: Test with bodies present when possible. A crowded room absorbs RF differently than an empty one, and a system that works in a soundcheck can drop out once the audience arrives.
Check: RF meter stays above the minimum indicator (usually two or more bars) everywhere the mic will travel, with zero dropouts during the walk test.
Step 9: Lock the settings and prepare spares
Engage the lock function on the receiver and transmitter menus (often done by holding a button for several seconds) so buttons cannot be pressed accidentally during the event. Place spare batteries at the mixing position where you can reach them without searching.
Check: Pressing transmitter buttons produces a lock icon or no response, and spare batteries are staged and accessible.
Common Mistakes to Avoid
- Skipping the frequency scan and using whatever channel the system powered up on. — Always run the scan at the actual venue, with all other wireless gear running. A channel that is clean in your living room may collide with local TV broadcast or Wi-Fi at the event site.
- Setting transmitter gain too high, causing distortion that no mixer adjustment can remove. — Set gain on the transmitter first using the receiver’s meter, with the performer projecting at real volume. Only then adjust level at the mixer.
- Hiding the receiver in a closed rack or behind the stage, blocking the antennas. — Keep the receiver in line of sight of the microphone area, antennas up and clear of metal. Use remote antennas if the receiver must be enclosed.
- Running multiple wireless systems on default frequencies that overlap. — Configure one system at a time: scan, sync, verify, then move to the next. Confirm each receiver shows a different frequency before the event.
Troubleshooting
Problem: No sound at all from the microphone.
Solution: Work through the chain in order: transmitter powered on with fresh batteries, RF meter shows signal on the receiver, audio cable is seated firmly at both ends, MIC/LINE switch matches the input type, mixer channel is unmuted with the fader up. Nine times out of ten the fault is a muted channel or a MIC/LINE mismatch.
Problem: Audio drops out or swishes during use.
Solution: First, replace the transmitter batteries. If dropouts continue, re-run the frequency scan and re-sync. If they still occur, move the receiver closer to the performance area or raise it higher — you are at the range or obstruction limit.
Problem: Loud buzz or hum in the audio.
Solution: This is usually an electrical ground issue, not a wireless problem. Plug the receiver, mixer, and speakers into the same power strip or circuit, and use balanced XLR cables between the receiver and mixer wherever possible.
Problem: Transmitter will not sync with the receiver.
Solution: Hold the transmitter’s IR window directly facing the receiver’s sync port, 2 to 5 centimeters away, and press sync once. If it still fails, set the frequency manually: match the group and channel numbers exactly on both units. Replace the batteries, as a weak transmitter sometimes rejects sync.
What Success Looks Like
Your setup is complete and correct when all of the following hold: the receiver’s RF meter shows steady signal (two or more bars) everywhere the microphone will travel; loud speech or singing lights most of the audio meter without triggering the clip indicator; the sound through the mixer or speaker is clean, at correct volume, and free of buzz or distortion; a full walk-test of the performance area produces zero dropouts; and transmitter batteries are fresh with spares staged. If any of these fail, revisit the troubleshooting section before the event — never assume a problem will fix itself once an audience arrives.
Next Steps
Recheck battery levels before every use and re-run the frequency scan whenever you change venues or add wireless equipment nearby. If you regularly run three or more wireless microphones, read your receiver manual’s section on frequency groups, which keeps multiple channels coordinated automatically. For fixed installations, consider mounting the antennas on a wall above the audience for permanently improved reception. When problems exceed this guide — persistent dropouts in difficult venues, large multi-mic deployments, or coordination with broadcast TV — consult the manufacturer’s frequency support tools or hire an audio technician for the initial setup, then document the working settings so you can reproduce them.
Frequently Asked Questions
How far can a wireless microphone reliably reach?
Most consumer and prosumer systems work reliably at 30 to 60 meters (100 to 200 feet) with line of sight. Walls, crowds, and metal structures reduce this substantially. If your walk test shows dropouts at the far end of your space, move the receiver closer or mount the antennas higher.
Can I use multiple wireless microphones at the same time?
Yes, as long as each system operates on a different frequency. Configure them one at a time — scan and sync the first, then re-scan and sync the second — so the receiver avoids frequencies already in use. Budget systems usually support 2 to 4 units reliably; professional systems handle 10 or more.
How long do transmitter batteries last?
Typically 6 to 10 hours with quality alkaline AAs, and 4 to 8 hours with rechargeable packs depending on capacity. Always start above full or near-full charge and keep spares on hand. Replace or recharge before any event if the indicator shows less than half.
Why does my microphone work fine in soundcheck but drop out during the show?
Two common causes: the audience’s bodies absorb and reflect radio signals, changing reception conditions; and phone hotspots, camera Wi-Fi, and LED walls that power up for the show create new interference. Do the walk test with the space as close to show conditions as possible, and re-scan if problems appear.
Do I need a license to operate a wireless microphone?
Most systems in the legal frequency bands (such as 900 MHz, 1.9 GHz, or 2.4 GHz in the US) require no license for typical event use. Systems operating in TV broadcast spectrum may require registration or licensing depending on your country and venue size. Check your system’s frequency band and your national regulator’s rules if you are using professional UHF equipment.
Evergreen bestsellers Picks
bestsellers
As an affiliate, we earn on qualifying purchases.