To record drums in a small room, start by managing acoustics with bass traps, foam panels, or blankets to reduce unwanted reflections. Position microphones close to the drums, focusing on proper placement to capture a natural sound, while carefully checking phase relationships. Use directional mics to minimize room spill and experiment with placement and angles for the best tone. Pay attention to your monitoring setup to catch issues early. Keep exploring these strategies to reveal better drum sounds.
Key Takeaways
- Use acoustic treatments like bass traps and foam panels to control reflections and reduce room reverberation.
- Position microphones close to drums, ensuring proper phase alignment and experimenting with angles for best tone.
- Incorporate overhead mics at 3-4 feet above cymbals for a natural kit sound, balancing distance and placement.
- Choose directional microphones to minimize room spill and reflections, and monitor carefully for issues.
- Maintain accurate monitoring and patience to make small adjustments that significantly improve recording quality.

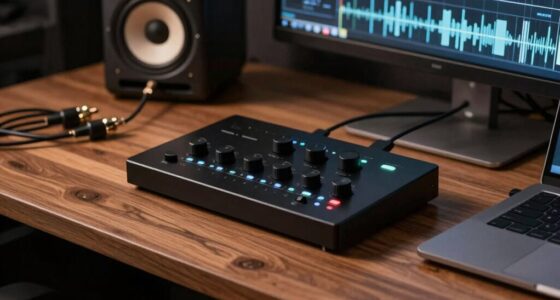
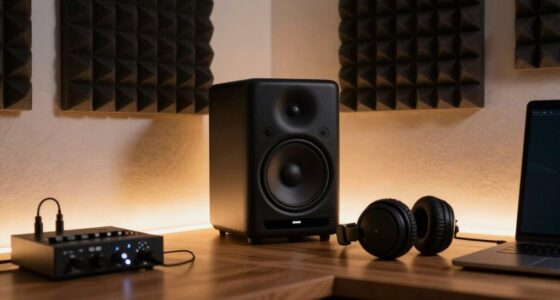
Recording drums in a small room can be challenging, but with the right techniques, you can achieve a professional sound. The first thing to understand is that room acoustics play a vital role. Small rooms tend to have reflective surfaces that cause unwanted reverberations, muddiness, or harshness in your recordings. To combat this, start by evaluating your space. Use acoustic treatment like bass traps, foam panels, or even blankets and rugs to absorb excess reflections. These materials help tame the room’s natural reverb, giving your drums clarity and punch. The goal is to create a balanced acoustic environment that doesn’t color the sound excessively. Once you’ve improved the room acoustics, focus on microphone placement. Proper placement is key to capturing a tight, balanced drum sound. Position your microphones close to the drums, but not so close that you pick up unwanted mechanical noises or overly emphasize certain frequencies. For a standard setup, place a dynamic mic or a condenser mic about 2-3 feet above the snare, angled slightly toward the center. This captures the attack and body of the snare while minimizing bleed from other drums. The kick microphone should be placed inside or just outside the bass drum, aiming toward the beater head, to emphasize low-end punch. Overhead mics should be positioned in a spaced pair or XY configuration above the kit, roughly 3-4 feet above the cymbals, to capture the overall kit sound with a sense of stereo image. Experiment with angles and distances to find the sweet spot that yields a balanced, natural sound. Remember, microphone placement isn’t static; small adjustments can considerably impact the tone. Additionally, use directional microphones whenever possible to reduce spill from other sources and room reflections. If you’re working with just a few mics, consider using a combination of close-mics and overheads to blend a natural kit sound. Don’t forget to check phase relationships between mics—misaligned phases can cause thin or hollow sounds. Use your ears and a phase switch or phase invert button to fine-tune. Be mindful of your monitoring environment during recording. Accurate monitoring helps you make better placement decisions and hear issues like room reflections or bleed that can be mitigated with better mic positioning or acoustic treatment. Incorporating soundproofing techniques can further improve the recording quality by reducing outside noise and internal reflections. With patience and careful attention to room acoustics and microphone placement, you can transform a small room into a capable drum recording space that delivers professional-quality results.

8 Pack – Bass Traps Acoustic Foam Corner, 8''x8''x12'' Black Bass Traps Corner Studio Foam, High Density and Fire-Proof Acoustic Panels Recording Studio Acoustical Treatments
Acoustic Principle- Bass Trap is a kind of sound absorbing structure specially used to absorb specific low-frequency standing…
As an affiliate, we earn on qualifying purchases.
As an affiliate, we earn on qualifying purchases.
Frequently Asked Questions
What Are the Best Microphone Placements for Small Rooms?
To get the best microphone placements in small rooms, consider your room dimensions and aim for balanced sound. Use cardioid or hypercardioid polar patterns to minimize room noise and focus on the drums. Position overhead mics about 2-3 feet above the kit, angled slightly downward. Place snare and kick mics close to the drums to reduce reflections. Experiment with distances to find the sweet spot, avoiding walls and corners for clearer recordings.
How Can I Prevent My Drums From Sounding Boxy?
To prevent your drums from sounding boxy, focus on your room dimensions and acoustic treatment. You should add acoustic panels to absorb excessive reflections, especially on parallel walls, to reduce flutter echoes. Also, consider positioning drums away from walls to minimize bass buildup and resonance. Using bass traps in corners can further improve sound clarity. These steps help create a more balanced, natural drum sound in small spaces.
What Room Treatments Are Most Effective for Drums?
Did you know that acoustic panels can reduce room reflection by up to 80%? For drums, these panels are your best bet. Place them strategically around your room, especially behind and beside your kit, to absorb unwanted sound reflections. This minimizes muddiness and enhances clarity. Effective room treatments like acoustic panels improve your drum sound quality profoundly, ensuring your recordings are punchy, clear, and professional.
How Do I Choose the Right Microphones for Small Spaces?
You should choose microphone types based on your budget and the drum sound you want. Dynamic mics are affordable and great for close miking, while condensers capture more detail but cost more. For small spaces, opt for smaller, less sensitive microphones to minimize room reflections. Prioritize versatile options like cardioid condensers or dynamic mics, and balance your choices with your budget to get the clearest, most controlled drum recordings possible.
Can Digital Plugins Improve Drum Sound in Small Rooms?
Digital plugins can definitely improve your drum sound in small rooms by compensating for poor room acoustics. With the right plugins, you can add clarity, punch, and warmth, making your drums sound bigger and more professional. They help shape your tone, reduce unwanted reflections, and enhance overall mix clarity. Just remember, plugins work best when combined with good recording techniques and proper room treatment for the best results.

Pyle 7-Piece Wired Dynamic Kit-Kick Bass, Tom/Snare & Cymbals Microphone Set-for Drums, Vocal, & Other Instrument-Complete with Thread Clip, Inserts, Mics Holder & Case, Black
HIGH-PERFORMANCE SPECS: Features 70dB S/N ratio, Balanced XLR inputs, 24–48V phantom power capability, unidirectional sound clarity, 50Hz–18kHz frequency…
As an affiliate, we earn on qualifying purchases.
As an affiliate, we earn on qualifying purchases.
Conclusion
So there you have it—your foolproof plan to turn that tiny room into a drum paradise. Who knew a few clever tricks could make your recordings sound like a stadium? Just remember, no matter how much you tweak, your neighbors will still hate you. But hey, at least now you can pretend you’re a mixing genius instead of just a guy with drums in a closet. Happy recording, and may your neighbors forgive you someday!

Phenyx Pro PDM35 Overhead Condenser Microphone, Cardioid Microphone with Wide Frequency Response Range, XLR Connector, Pencil Stick Condenser Mic for Hi-Hat, Percussions, and String Instruments
WIDE RANGE OF CLARITY: Featuring a wide frequency range, this overhead condenser microphone delivers crisp high-frequency detail and…
As an affiliate, we earn on qualifying purchases.
As an affiliate, we earn on qualifying purchases.

Hosa GXX-195 Phase Reverser, XLR3F to XLR3M
Phase Correction: Reverses the phase of an XLR signal (pin 2 & 3).
As an affiliate, we earn on qualifying purchases.
As an affiliate, we earn on qualifying purchases.