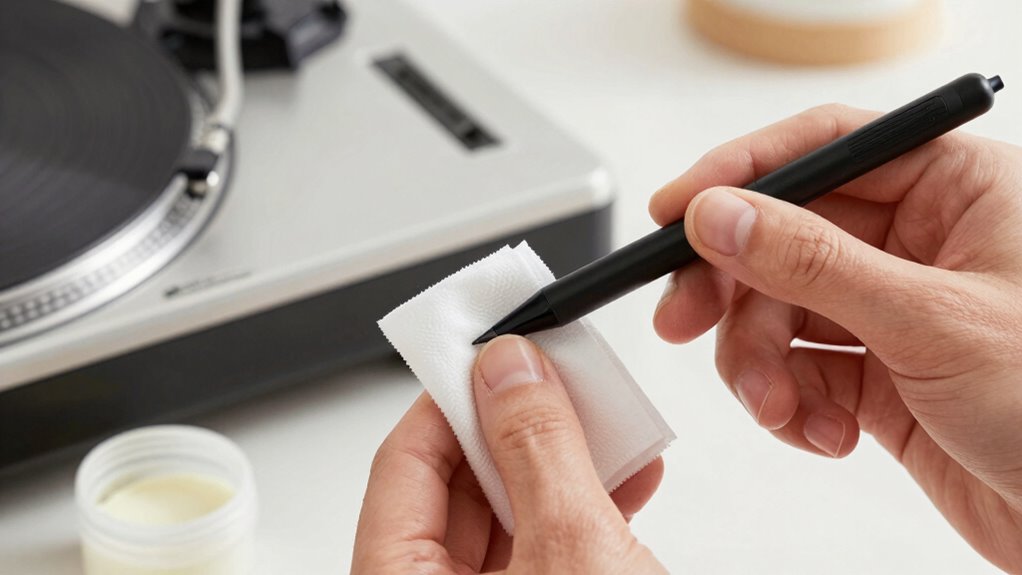

To clean your stylus safely, turn off and unplug your turntable first. Use a soft brush with gentle, sweeping motions, following the direction of the stylus tip, to remove dust and debris. Apply a small amount of stylus cleaning gel or use a specialized cleaning pad, avoiding excessive pressure. Always follow the manufacturer’s instructions to prevent damage. For more detailed tips and techniques to keep your stylus in top condition, keep exploring the proper cleaning methods.
Key Takeaways
- Turn off and unplug the turntable before cleaning to prevent damage or injury.
- Use a soft, fine-bristled stylus brush to gently sweep dust in the same direction as stylus movement.
- Apply a small amount of stylus cleaning gel or solution directly onto the stylus tip, avoiding excess.
- Use specialized cleaning pads or guards to protect the stylus during cleaning procedures.
- Follow manufacturer instructions and avoid harsh household items to prevent stylus and record damage.
Over time, dust and debris can accumulate on your stylus, affecting sound quality and record preservation. Regular stylus maintenance isn’t just about keeping your records sounding their best—it also extends the lifespan of your stylus and cartridge. The key to effective cleaning lies in using the right cleaning tools and techniques that won’t cause damage. Proper safety precautions include ensuring your turntable is powered off and unplugged before cleaning to prevent accidental damage or injury. Start by gathering the appropriate cleaning tools for your stylus. Soft brushes, stylus cleaning gels, and specialized cleaning pads are all designed specifically for this purpose. Avoid using household items like paper towels or rough cloths, which can scratch or dislodge the delicate stylus tip. A gentle brush with soft, fine bristles is often the best choice. You should use it to carefully sweep away dust and debris from the stylus tip, moving in the same direction as the stylus’s tip to avoid pushing particles deeper into the cantilever or damaging the stylus. When cleaning, make sure your turntable is powered off and unplugged to prevent accidental damage or injury. If you’re using a stylus cleaning gel, apply a small amount directly onto the stylus tip, then gently lift away dirt and grime as the gel traps debris. For brushes, lightly sweep the stylus without applying excessive pressure—pressing too hard can bend or break the delicate needle. If your stylus has a protective cover or guard, use it during cleaning to prevent accidental damage. Consistency is key. Incorporate stylus cleaning into your routine after every few listens or at least once a week if you’re a frequent listener. This routine maintenance prevents the buildup of dust, mold, or other contaminants that can impair sound quality. When using cleaning tools, always follow the manufacturer’s instructions for the best results. Some cleaning gels and brushes are designed for specific stylus types, so make sure you’re using compatible products. Remember, the goal is to remove dirt without risking damage to the stylus or its delicate components. Proper stylus maintenance, combined with careful cleaning tools and techniques, ensures your records stay pristine and your listening experience remains sharp and clear.
Frequently Asked Questions
Can I Use Alcohol to Clean My Stylus?
You can use alcohol for stylus cleaning, but only if you guarantee alcohol safety. Use isopropyl alcohol with at least 70% concentration and apply it sparingly with a soft cloth or cotton swab. Avoid pouring alcohol directly onto the stylus to prevent damage. Carefully clean the stylus tip, making sure not to press too hard, and let it dry completely before using it again to keep your stylus in top condition.
How Often Should I Clean My Stylus?
You should clean your stylus every 20-30 hours of listening or when you notice a decline in sound quality. Regular cleaning helps extend its lifespan and maintains maximum performance. Keep an eye out for dust or debris, and clean it gently to prevent damage. Consistent cleaning frequency ensures your stylus stays in top shape, avoiding unnecessary wear and tear while preserving audio clarity.
Is It Safe to Use a Toothbrush?
They say, “Better safe than sorry,” and that applies to cleaning your stylus. Using a toothbrush for cleaning is safe if you choose one with soft bristles and gentle motion. Toothbrush safety means avoiding harsh scrubbing and abrasive materials. When cleaning with a toothbrush, be careful to prevent damage, and always follow proper techniques. This way, you keep your stylus clean without risking harm.
What Should I Avoid When Cleaning?
When cleaning your stylus, avoid abrasive cleaners that can scratch or damage its delicate surface. Never use excessive water or immerse it in water, as water damage can ruin the internal components. Stick to gentle, dry cleaning methods or a soft brush, and keep liquids away to preserve your stylus’s lifespan. By avoiding these mistakes, you guarantee your stylus stays in ideal condition and functions properly.
Can Cleaning Damage the Stylus’s Delicate Parts?
Cleaning your stylus can potentially harm its delicate components if you’re not careful, but with proper techniques, you safeguard its longevity. Avoid harsh chemicals and excessive pressure, which can damage the stylus’s fine parts. Use gentle, approved cleaning materials to guarantee the safety of the delicate components. By following proper procedures, you maintain your stylus’s performance and extend its lifespan, keeping it in ideal condition for longer.
Conclusion
Now that you know how to clean your stylus safely, you’re all set to keep it in tip-top shape. Think of your stylus as the brush to your musical canvas—without a clean tip, your masterpiece suffers. Regular maintenance isn’t just a chore; it’s the secret to flawless sound quality and longevity. So, handle it with care, stay consistent, and let your music shine brighter than ever. After all, a clean stylus is the key to pure, beautiful sound.