TL;DR
Moving your rig out of the way is the most effective way to reduce noise. When placement is limited, strategic treatment—like sealing gaps, placing foam on reflective surfaces, and using bass traps—can dramatically improve sound quality without sacrificing space or budget.
Ever wondered why some closet setups sound surprisingly good, while others turn into echo chambers? The secret isn’t just about slapping foam everywhere. It’s about where you place your gear, how you treat reflective surfaces, and understanding the real difference between dampening and soundproofing.
Most of your noise problem vanishes when you move your rig out of your workspace. But if that’s not an option, strategic placement and smart treatment turn a tiny, cramped closet into a professional-sounding booth. Here’s how you can do it without breaking the bank or sacrificing your space.
Acoustic dampening
& the rig in the closet.
The most powerful noise fix isn’t a material — it’s a floor plan. A rig you can’t hear because it’s in another room beats any amount of foam. Tap the approaches in Part 1 to see what actually works.
(another room)
(levers 1–4)
(door / barrier)
(acoustic foam)
Contain the noise, not the heat
Key Takeaways
- Moving your rig into another room is the simplest way to eliminate noise issues.
- Treat reflection points—especially in the ceiling, walls behind the mic, and corners—to dramatically improve sound quality.
- Sealing gaps and covering reflective hard surfaces with foam or blankets reduces echo and leakage.
- Ensure proper ventilation when placing a computer or rig inside a sealed closet or cabinet.
- Don’t overdo it—target treatment to problem spots for the best balance between sound quality and space.

Focusound 52 Pack Acoustic Foam Panels 1" x 12" x 12" Sound Proof Foam Panles Soundproofing Noise Cancelling Wedge Panels for Home Office Recoding Studio with 300PCS Double-Side Adhesive
- Soundproofing Design: Triangular grooves for noise absorption
- Includes Adhesive Tape: 300pcs double-sided adhesive for easy installation
- Easy Shape Recovery: Soak in water to restore shape
As an affiliate, we earn on qualifying purchases.
As an affiliate, we earn on qualifying purchases.
Why Moving Your Rig Is the Best Noise Solution
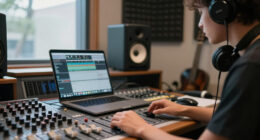
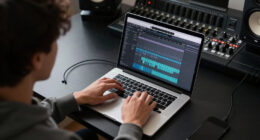
Putting your high-power AI rig or recording gear in another room is by far the most effective way to cut noise. When you’re SSH’ing into a machine in the basement or closet, it doesn’t matter how loud it gets. Your workspace stays silent, and you gain peace of mind.
Imagine working on a podcast or AI project while your noisy GPU hums away behind a closed door. You focus on your work, not the racket. That’s the power of distance. Plus, a wired network connection and good ventilation make this setup seamless.

8 Pack - Bass Traps Acoustic Foam Corner, 8''x8''x12'' Black Bass Traps Corner Studio Foam, High Density and Fire-Proof Acoustic Panels Recording Studio Acoustical Treatments
- Acoustic Principle: Absorbs low-frequency standing waves
- Application Areas: Suitable for studios, theaters, and more
- Material & Safety: High-density, fire-retardant acoustic foam
As an affiliate, we earn on qualifying purchases.
As an affiliate, we earn on qualifying purchases.
The 'Rig in the Closet' Setup — How to Keep It Cool and Quiet
Sealing a closet for a computer sounds perfect—quiet and out of sight. But heat is the enemy. A 600W GPU can turn a closet into an oven in no time. The trick? Ventilation. You need active airflow—either passive vents or, better yet, quiet exhaust fans—to move hot air out.
Some companies craft purpose-built soundproof cabinets with ducted airflow and temperature control. They cost more but solve both noise and heat issues effectively. Remember, sealing the space without ventilation just traps heat and risks overheating your rig.
For more on cooling options, check out this guide on reducing heat and noise in AI workstations.

18 Pack Black Acoustic Panels 12"X12"X 0.4"Sound Absorbing Panel Wall Decoration Soundproof Wall Panels High-Density Sound Deadening Panels Acoustic Treatment Panel For Home Studio
- Material: Safe polyester fiber, durable and non-toxic
- Design: 45° chamfered edges for seamless installation
- Soundproofing: High-density panels improve acoustic quality
As an affiliate, we earn on qualifying purchases.
As an affiliate, we earn on qualifying purchases.
Where to Place Acoustic Treatment for Best Results
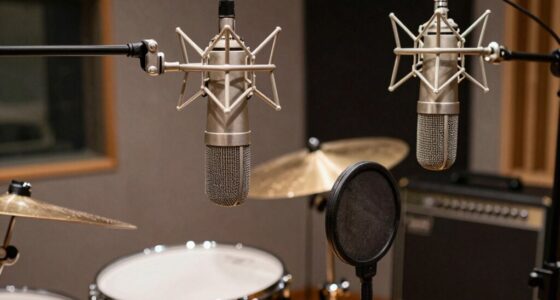
Start by understanding that sound reflects off surfaces, creating echoes and muddiness that can obscure clarity. The placement of your treatment matters because sound waves bounce in predictable ways—targeting these reflection points reduces unwanted reverberation. For example, if you record vocals in the corner, the wall behind and the ceiling above tend to reflect sound directly back into the mic, causing muddiness. Treating these surfaces absorbs these reflections, resulting in clearer recordings.
In small spaces, the first reflection points—usually the wall directly behind the mic and the ceiling—are critical because they are the first surfaces the sound hits after leaving the source. Absorbing these points prevents sound from bouncing directly back, which can cause comb filtering and echo. Using foam panels or blankets here helps tame these early reflections, leading to a more natural sound.
And don’t forget corners. Bass traps placed in the upper corners of your closet can reduce low-frequency buildup by up to 60%, smoothing out the sound. These low-end resonances often create a 'boomy' or 'boxy' tone that can obscure detail. Proper treatment of these areas prevents the buildup of standing waves, ensuring your recordings sound balanced and natural, even in confined spaces.

TroyStudio Portable Vocal Booth, Large Foldable Microphone Isolation Shield, Music Recording Studio Sound Echo Absorbing Box, Desk & Stand Use Reflection Filter with Thickened Dense Acoustic Foam
- Large Interior Space: 8''x10''x12'' for various equipment
- Compact Foldable Design: Folds to 12''x12''x6'' for portability
- Lightweight and Portable: Weighs only 2 lbs for easy transport
As an affiliate, we earn on qualifying purchases.
As an affiliate, we earn on qualifying purchases.
The Role of Surfaces: Hard vs. Soft Materials
Hard surfaces like the closet door, desks, and exposed walls bounce sound around, creating harsh reflections that muddy the sound and reduce clarity. Covering these with foam, blankets, or rugs softens the sound and reduces echo. For example, hanging a thick blanket over the door can significantly cut reflections, but also consider adding foam panels or fabric diffusers to break up the sound waves more evenly. This prevents overly dead environments that can make recordings sound unnatural.
Floor treatment matters too. A rug or thick carpet absorbs footfalls and reflections from below, creating a warmer, more controlled sound. Without proper flooring, low-frequency reflections can bounce around, adding to muddiness or boomy tones. Strategic placement of absorbent materials on reflective points—like the back wall or ceiling—can outperform random coverage, ensuring that sound is absorbed precisely where it causes the most problem. This targeted approach balances absorption and liveliness, maintaining a natural sound while controlling problematic reflections.
Common Mistakes That Ruin Closet Sound Quality
Ignoring the door is a big one. Leaving gaps or a bare wooden door lets sound leak and reflections bounce around, which can ruin your recordings or cause noise bleed. Sealing gaps with weatherstripping or adding a door blanket helps contain sound and prevents reflections from bouncing back into your microphone. This simple step can dramatically improve the acoustic environment.
Overusing thin foam everywhere can deaden the sound too much, creating a dull, non-natural tone. Excessive absorption kills the room’s liveliness and can make recordings sound sterile or muffled. Instead, target specific reflection points and corners for treatment, maintaining some natural reverberation that preserves the clarity and warmth of your sound.
And don’t forget the corners—skipping bass traps invites low-end buildup, turning your small space into a boomy mess. Properly placed bass traps in the upper corners help balance the low frequencies, avoiding that 'muddy' or 'boomy' sound that can dominate in small, untreated spaces.
Real-World Setup Examples — How Creators Use Closets
Take a singer-songwriter working in a tiny bedroom closet. She places a reflection filter behind her mic, hangs foam panels on the side walls, and puts a thick rug under her feet. The result? Clear vocals with minimal echo, all in a cramped space. This setup works because each element reduces specific reflections—filters block direct sound paths, foam absorbs mid and high frequencies, and the rug dampens footfalls and floor reflections. These combined treatments create a balanced environment that maximizes clarity without requiring a dedicated studio.
Or a voiceover artist seals her closet door with weatherstripping, adds bass traps in the corners, and uses a portable reflection filter. Her recordings sound professional without a dedicated studio. The key is understanding where the reflections and resonances originate and addressing those specific points with targeted treatment.
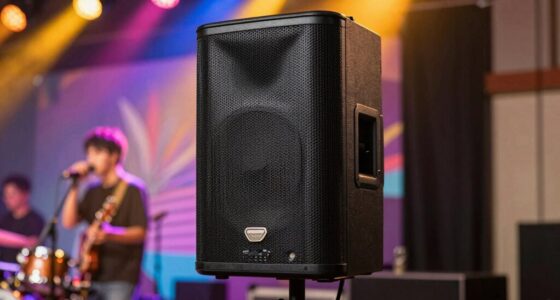
Even guitar amps can benefit from small closet setups—placing the amp inside, with treatment on reflective surfaces, reduces noise bleed and unwanted reflections. Proper placement and treatment result in cleaner recordings and less post-processing work.
FAQs — Your Most Common Closet Sound Questions Answered
- What’s the difference between acoustic treatment and soundproofing? Acoustic treatment reduces echo and reflections inside the space, making your recordings clearer and more natural. Soundproofing, on the other hand, blocks sound from escaping or entering, which is crucial if you want to prevent noise from leaking out or external noise from contaminating your recordings. Both are important but serve different purposes. Combining them ensures your space is both acoustically controlled and isolated from outside noise.
- Where should I place foam or panels in a closet booth? Focus on the first reflection points—these include the wall directly behind and above the mic, and the ceiling. Bass traps should be placed in the corners to manage low frequencies. This targeted placement helps absorb the most problematic reflections without over-treating the space, maintaining a natural sound while reducing echo and muddiness.
- Do I need bass traps in a small closet? Yes, especially because small spaces tend to amplify low frequencies, leading to a boomy or muddy sound. Bass traps in the upper corners help absorb these resonances, balancing the sound and preventing standing waves that can distort your recordings.
- How much treatment is enough? It depends on your specific space and goals. Start with coverage on reflection points, corners, and the door. Use your ears to evaluate—if you still hear excessive echo or low-end buildup, add more targeted treatment. The key is to find a balance that reduces problematic reflections without dulling the natural sound.
- Will blankets work as well as foam? They can, especially for sealing gaps or covering reflective surfaces. However, foam panels are designed specifically for acoustic control, offering more predictable and consistent absorption. Using a combination of blankets for sealing and foam for treatment often yields the best results.
Conclusion
Turning a closet into a makeshift studio or AI rig space isn’t about throwing foam everywhere. It’s about smart placement, sealing gaps, and understanding how sound behaves in small spaces. When you treat the right surfaces and keep your gear cool, you gain professional quality without a professional studio.
Think of your closet as a blank canvas—add the right treatment, and it transforms into a quiet, effective workspace. Your best recordings and AI projects deserve it. So, get strategic, stay cool, and make that closet work for you.